There is a moment in every homeowner’s life when they stand at the top of the basement stairs, look down into the gloom, and decide, “It’s time.” Maybe you’re tired of that wood paneling from the 70s, or perhaps you just need an extra bedroom because the kids are getting older. Whatever the reason, finishing or remodeling a basement is one of the most rewarding projects you can take on. It adds value, it adds space, and honestly, it just makes the house feel complete.
But before you get to the fun part—picking out paint colors or installing that wet bar—you have to deal with the messy part. The really messy part. Demolition and waste management aren’t exactly glamorous, but they are the backbone of any successful renovation. You can’t build the new until you clear out the old. And if you think you can handle a full basement gut job with just your standard weekly trash bins, well, you’re in for a rough couple of weeks. You need a plan, and usually, that plan involves a big metal box sitting in your driveway.
Managing the debris flow is actually where a lot of projects in Salt Lake City and surrounding areas get bogged down. You start swinging the sledgehammer, and suddenly you’re knee-deep in drywall and studs with nowhere to put them. It kills your momentum. So, let’s talk about how to handle this smoothly, keep your neighbors happy, and save your back in the process.
Contents
Sizing Up the Situation: Don’t Guess, Estimate
Here’s the thing about basement debris: it expands. When drywall is on the wall, it looks neat and tidy. When you smash it down, it turns into a fluffy, jagged mountain that takes up way more space than you’d expect. One of the biggest mistakes we see people make is underestimating the volume of trash they are going to generate.
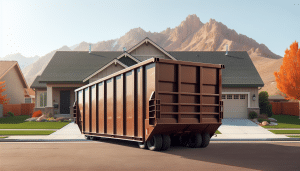
You might look at a room and think, “Oh, that’s maybe a pickup truck load.” Trust me, it’s probably three. If you’re tearing out flooring, especially tile or heavy carpet, the weight adds up fast. If you are in Sandy or Draper, homes often have larger basements with substantial square footage. A 10-yard dumpster might look big when it arrives empty, but once you start throwing old framing and ceiling tiles in there, it fills up quicker than a parking lot at a Jazz game.
Ideally, you want to size up slightly. If you think you’re on the fence between a 15-yard and a 20-yard container, go for the bigger one. It is much cheaper and less of a headache to pay for a slightly larger dumpster once than to pay for a second haul because you ran out of room by a few cubic feet. Plus, having that extra breathing room allows you to dispose of other household junk you’ve been meaning to toss. We all have that pile of broken garden tools in the garage, right?
Location, Location, Location (Of the Dumpster)
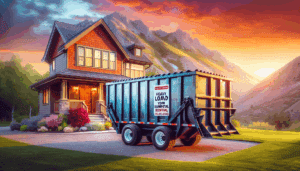
Where you put the dumpster matters just as much as what you put in it. Most of the time, the driveway is the go-to spot. It’s close to the house, which means less walking back and forth with heavy debris. But you have to be smart about it. Asphalt driveways, especially in the heat of a Utah summer, can get soft. A heavy steel bin can leave divots if you aren’t careful.
We always recommend placing wood planks underneath the wheels or rails of the dumpster. It distributes the weight and protects your property. It’s a simple step, but you’d be surprised how often it gets overlooked in the rush to get started. If your driveway is on a steep slope—which happens a lot in places like the benches in Ogden or Layton—we need to know that beforehand. Gravity is not our friend when loading a dumpster on a steep incline, and the doors can be dangerous to open if the angle is wrong.
What if you can’t use the driveway? Maybe you have a shared lane or it’s just too narrow. You might be thinking about the street. In many cities, like Salt Lake City proper or Park City, putting a dumpster on the public road requires a permit. It’s not a huge deal, but it is paperwork you need to handle before the truck shows up. You don’t want a code enforcement officer slapping a fine on your shiny rental bin on day one.
The Art of “Tetris” Packing
You know how you pack a suitcase when you’re trying to avoid checking a bag at the airport? You roll the clothes, you stuff socks in the shoes, you use every inch. Loading a dumpster rental requires a similar mindset. We call it “Dumpster Tetris.”
If you just toss things in willy-nilly, you create air pockets. Air pockets are expensive because you’re paying for space you aren’t using. Start with the heavy, flat stuff on the bottom. If you are ripping up floorboards or paneling, lay them flat. Don’t let them stick up diagonally. This creates a solid base.
Bulky items like cabinets or old furniture should be broken down. If you toss a whole vanity cabinet in there, it’s mostly empty space inside. Smash it up. Flatten it. It feels pretty good to break stuff, doesn’t it? Take out some frustration on that old vanity. By breaking down the bulky items, you can fit significantly more material into the same size container. This is crucial for larger renovations in Orem or anywhere with older housing stock where the materials tend to be heavy and awkward.
Keep the Nasty Stuff Out
This is where things can get a little tricky. When you’re in the “demo zone,” the temptation is to grab everything that looks like trash and heave it into the bin. But hold on a second. Not everything can go to the landfill.
Hazardous waste is a no-go. This includes things like paint cans (unless the paint is totally dried out), batteries, tires, and anything with asbestos. If you are renovating an older home, say, pre-1980s, be very careful with insulation and floor tiles. If you suspect asbestos, you need a specialist, not a dumpster. Throwing hazardous materials into a rental dumpster isn’t just against the rules; it causes problems at the sorting facility and can lead to extra fees for you.
Also, keep an eye out for electronics and appliances. Some of these have specific disposal fees or recycling requirements in Utah. If you aren’t sure, just ask us. It’s better to set those items aside for a separate run to the recycling center than to have to dig them out of a full dumpster later.
Managing the Dust and the Path
Let’s take a quick detour from the dumpster itself to talk about the path to the dumpster. You are going to be walking in and out of your house hundreds of times carrying dirty, dusty, heavy stuff. If your basement has a walk-out entrance, you have hit the jackpot. You are the lucky one. For everyone else, you’re likely hauling debris up the stairs and through the house.
You need to protect your living space. Plastic sheeting is your best friend here. Tape off the doorways to the rest of the house to keep the dust contained in the basement. Put down heavy cardboard or Ram Board on your floors along the walking path. Construction dust is insidious; it finds its way into everything—your toothbrush, your cereal, your linens. Containing it at the source is much easier than cleaning the whole house later.
Also, think about the window. Sometimes, the easiest way to get trash out of a basement is to remove a window sash and build a temporary chute. It sounds like a lot of effort, but gravity does the work for you. You slide the debris down directly into the roll-off dumpster positioned near the window well. Just make sure your aim is good!
Budgeting for Weight
Most people budget for the rental cost, but they forget about the weight. Dumpster rentals usually come with a weight limit. Drywall, plaster, and especially concrete are incredibly dense. If you are breaking up a concrete slab or removing a brick fireplace, you can hit that weight limit long before you fill the volume of the container.
If you know you have heavy materials, let us know upfront. We might suggest a specific type of container or a different size to handle the load safely. Overweight fees can be a nasty surprise at the end of a project, and we’d rather help you avoid them. It’s all about communicating what you’re tearing out so we can get you the right tool for the job.
Honestly, getting the waste management part right makes the rest of the renovation feel lighter. There is a psychological weight that lifts when the debris is gone. You aren’t stepping over piles of broken wood anymore. You can see the space. You can see the potential. That’s when the excitement comes back.
Don’t Go It Alone
Renovating a basement is a massive undertaking. Whether you are a DIY warrior spending your weekends covered in drywall dust or a business owner managing a flip, you have enough on your plate without worrying about where the trash goes. You need a partner who shows up on time, puts the bin where you want it, and hauls it away when you’re done.
At Utah Dumpster Rentals, we understand the local nuances—from the narrow streets of the Avenues to the steep driveways of the foothills. We aren’t just a faceless dispatch center; we’re part of this community. We want to see your project succeed just as much as you do.
So, are you ready to reclaim your basement? Stop tripping over debris and start building that dream space. Give us a ring, and let’s figure out exactly what size you need to get the job done right.